post status
This article is a stub. You can help the IndieWeb wiki by expanding it.
post status is information about various stages that a post can be in, from draft to published, and editorial workflow stages in between, like awaiting editorial approval, as well as varying visibility and whether a post is explicitly scheduled for publication.
Wordpress
Wordpress provides three options in the UI for setting the post status. "Status", "Visibility" and time.
Status
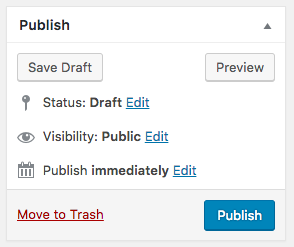
Upon starting a new post, Wordpress sets the post status to "draft" with a publish date of "immediately" and visibility of "public".
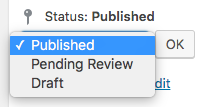
Before the post has been published, the possible settings of the "Status" dropdown are: Draft and Pending Review.
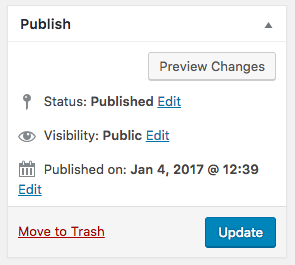
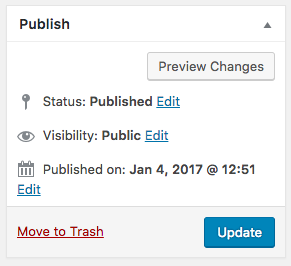
After clicking the "publish" button, the status changes to "Published", and the button changes to "Update"
At this point, the "Status" dropdown changes to include Published.
Visibility
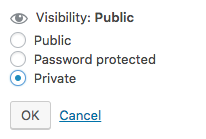
The visibility has the following options:
Public with pinned option
Clicking "edit" provides the following options.
Selecting "public" without the "sticky" box results in the following setting.
Selecting "public" with the "sticky" box results in the following setting.
Password protected
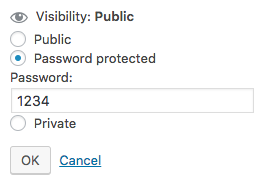
It is possible to set a password on posts, so that people visiting the permalink are prompted to first enter the password.
After this is set, the "status" remains "Published" but the "visibility" changes to "Password Protected"
Private
Posts can be made private. There are no further options available for private posts.
After setting a post to private, the "Status" changes to "Privately Published"
Published Date
The published date can be customized for posts.
Before a post is published the first time, the "Publish" field reads "immediately"
After clicking "Publish", the field changes to show the date and time the post was published, and the button changes to "Update".
Clicking "Edit" next to the date allows you to change the date of the post.
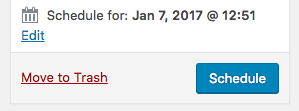
Changing the date to a date in the future and clicking "ok" prompts the user to schedule the post by clicking the new "Schedule" button.
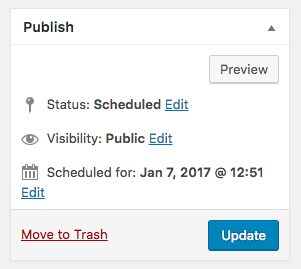
After clicking "Schedule", the "Status" changes to "Scheduled", and the scheduled date is shown.

