Tutorial: Set up a new Amazon cloud server, and log in
For this tutorial, we assume that you have access to an Amazon Web Services account.
In this tutorial, we will create a virtual cloud server (what Amazon calls an "instance") that will host your Indie Website. We will be using the UBOS Linux distribution, because it makes setting up a website and maintaining fairly simple.
Set up a new Amazon cloud server
Here are the steps:
| 1. | Click on the icon to the right. This will open a new browser window in which you can interact with the Amazon Web Services website, while this tutorial remains open. | |
| 2. | If you need to, log into the Amazon Web Services website. | 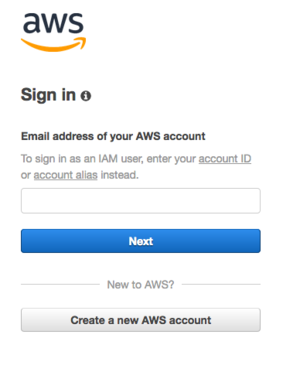 |
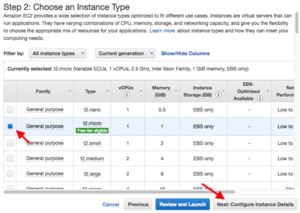
| 3. | Don't be surprised by the title of the Amazon web page: "Step 2: Choose an Instance Type". You got to skip Step 1 because the UBOS / AWS logo you clicked on automatically filled in the first step for you.
Now select how powerful/expensive or not-so-powerful/cheap you would like your cloud server to be. The selected default -- General Purpose, "t2.micro" -- is typically perfectly fine for personal websites. It is "Free tier eligible", which means you might not even have to pay for it for a full year. (Go to the Amazon EC2 price list.) So make your choice, and then click on "Next: configure instance details". |
 |
| 4. | You can ignore the page "Step 3: Configure Instance Details" and just continue with "Next: Add Storage". | 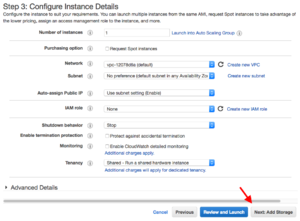 |
| 5. | And you can ignore page "Step 4: Add Storage" as well. Continue with "Next: Add tags" | 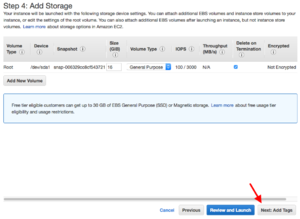 |
| 6. | "Step 5: Add Tags" is also not something you need to do. Continue with "Next: Configure Security Group" | 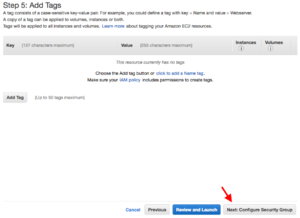 |
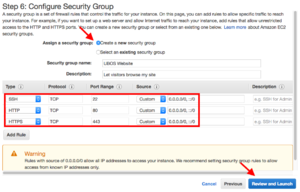
| 7. | But now you need to pay attention. In "Step 6: Configure Security Group", you need to tell Amazon that you want them to let visitors browse your site with http or https. You also need to be able to log into your server with ssh.
Check "Create a new security group", give it a name (like "UBOS website"), change the description if you like (like "Let visitors browse my site") and then have three rules in the section below by clicking "Add Rule" and filling out the form:
If you are not certain, compare with the screen shot to the right. Amazon displays a warning: "Warning: Rules with source of 0.0.0.0/0 allow all IP addresses to access your instance..." Ignore the warning because the whole point of your new website is that anybody can read it! Click "Review and Launch". |
 |
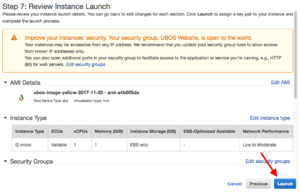
| 8. | In "Step 7: Review Instance Launch", we get another big warning about the same thing: "Your security group ... is open to the world". Yes, Amazon, that's exactly what we want.
You can otherwise ignore this page, as it only shows what you have entered so far, and if you carefully followed this tutorial, you will have it all correct! (Right?) Note that in the center of this page, under "AMI details", the identifier you are seeing may not be "ubos-image-yellow-2017-11-03" but something slightly different. That will happen as soon as there's a new UBOS release after this tutorial was created. Click "Launch" to continue. |
 |
| 9. | You would have thought that after giving you a "Launch" button, something would actually be launching, but Amazon pops up a dialog saying "Select an existing key pair or create a new key pair". This key pair will allow you, and only you, to log into your new virtual server. Think of it as a super-secure password that is hundreds of characters long! You don't have a key pair yet, so you need to create one:
|
|
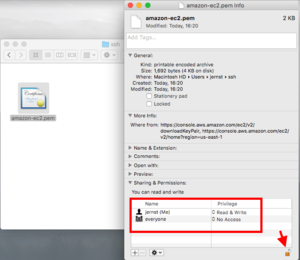
| 10a. | If you are on the Mac:
Your screen should look like the screen shot to the right. Then you can close your Finder windows. |
 |
| 10b. | If you are on Linux:
|
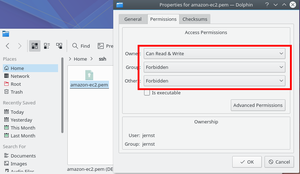 |
| 10c. | If you are on Windows: it works rather similar to the Mac and Linux, but we currently don't have a Windows machine handy, and so we can't try it out. Sorry. | |
| 11. | Now you can finally click "Launch Instance" and Amazon will create and turn on your new virtual server. The screen says "The following instance launches have been initiated:", followed by a code number. Click on that code number. | |
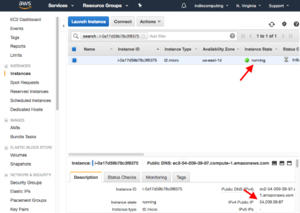
| 12. | Now you are at the main Amazon Web Services server management screen. It currently shows one server (an "instance") and its instance state. Just like your PC might be off, or booting, or ready to do some work for you, your virtual server can be running or not.
Wait until the "Instance State" is "Running". Then, select the row with your running instance. Note the "IPv4 Public IP Address" address in the bottom-right: it looks like number-dot-number-dot-number-dot-number. In the screenshot to the right it is |
 |
| 13. | Finally, you can log in! To do that, run your favorite command-line terminal, like Terminal.app on the Mac, konsole on Linux, or an SSL terminal program on Windows.
For example, on the Mac or in Linux, you would type (all on one line):
but only if the name of the file to which you saved your key earlier is SSH, security-paranoid as it is, will say "The authenticity of host ... can't be established" etc. etc. That's fine, say "yes" to the question whether you want to continue connecting. And, the prompt |
 |
| 14. | And we are done! To exit the terminal, type exit. To log back on, type the ssh command above again. And that's what we will do to actually install Wordpress.
|
